Get ready to take your nail game to the next level with these Easy Nail DIYs that will have you feeling like a professional nail artist in no time!
Whether you’re a beginner or only a nail enthusiast, these simple yet stunning techniques are guaranteed to spark your creativity and leave you with jaw-dropping results. From mesmerizing marble designs to chic geometric patterns, the possibilities are endless! Say goodbye to boring nails and hello to a world of endless nail art possibilities right at your fingertips. So grab your favorite polish and let’s get ready to nail it with these DIY masterpieces!
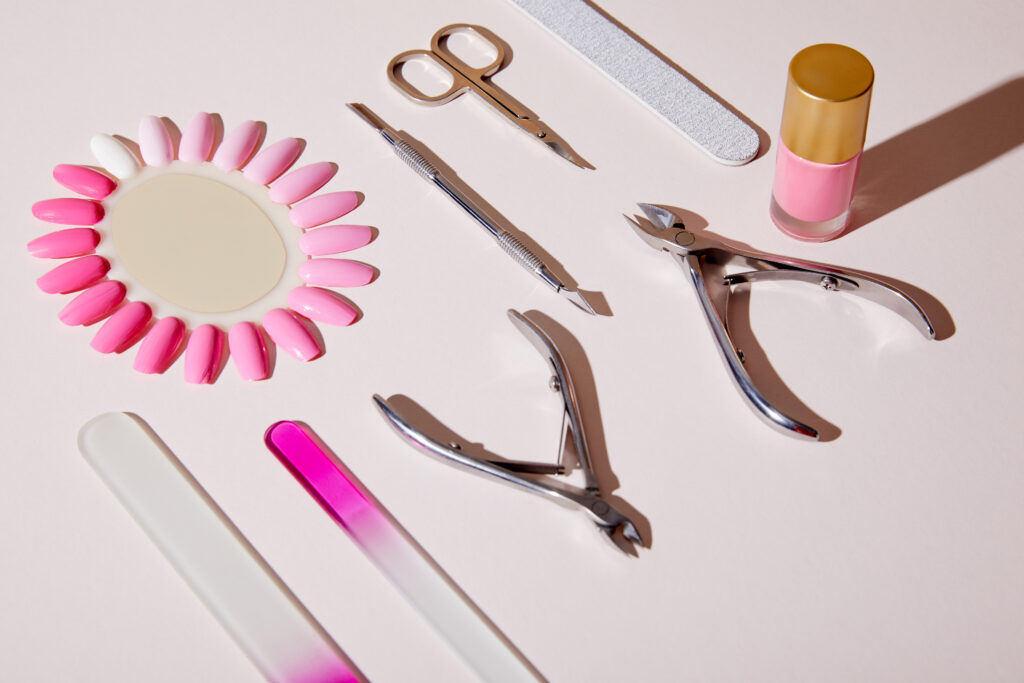
Essential Tools and Supplies
- A variety of nail polish colors for base coats and designs.
- Dotting tools for creating dots and intricate designs.
- Nail art brushes to paint fine lines and detailed artwork.
- Stationery Tape: Useful for creating straight lines and patterns.
- Nail polish remover for correcting mistakes and removing polish.
- Nail file to shape and smooth the nails.
- Hand scrub to exfoliate and prep the nail bed before polishing.
- Cuticle clipper and pusher for maintaining cuticles.
- Hand lotion to moisturize hands and cuticles.
- Nail art stones/rhinestones for adding sparkle and 3D effects.
- Nail polish corrector pen for precise touch-ups around the edges.
- Precision tweezers to apply nail art stones or sequins accurately.
- Quick dry top coat to protect your design and speed up drying time.
Tips and Tricks for Easy Nail DIYs
Starting with a clean canvas is crucial; ensure your nails are free of old polish and oils by using a nail polish remover. Once prepped, apply a base coat to protect your nails and enhance polish adherence. When choosing colors, consider the color wheel for harmonious combinations; complementary colors can make your design pop. During application, use thin layers of polish to avoid smudging and allow each layer to dry completely. For cleanup, dip a small brush in nail polish remover to neaten the edges. To prolong the lifespan of your nail art, seal your masterpiece with a quick-dry top coat and reapply every few days to prevent chipping. Remember, practice makes perfect, so don’t be discouraged by initial imperfections—patience and persistence are your best tools.
2024 DIY Inspiration Designs
Step into a world where your nails become the canvas, each color a stroke of genius. In this vibrant landscape of nail art, diversity reigns supreme. From the understated elegance of French tips to the daring drama of stiletto nails, styles vary widely. Colors tell their tales, with pastels whispering of spring’s gentleness and neons shouting summer’s energy. Themes emerge, reflecting moods or the spirit of the season—whether it’s the blooming florals of spring or the spooky silhouettes of Halloween.
This rich tapestry of designs, born from simple DIY techniques, serves as a wellspring of inspiration. It not only invites admiration but also action, prompting enthusiasts to pick up their brushes and experiment. With each creation, personal expression is celebrated, expanding the boundaries of nail art and inviting everyone to leave their unique imprint on the world of beauty.
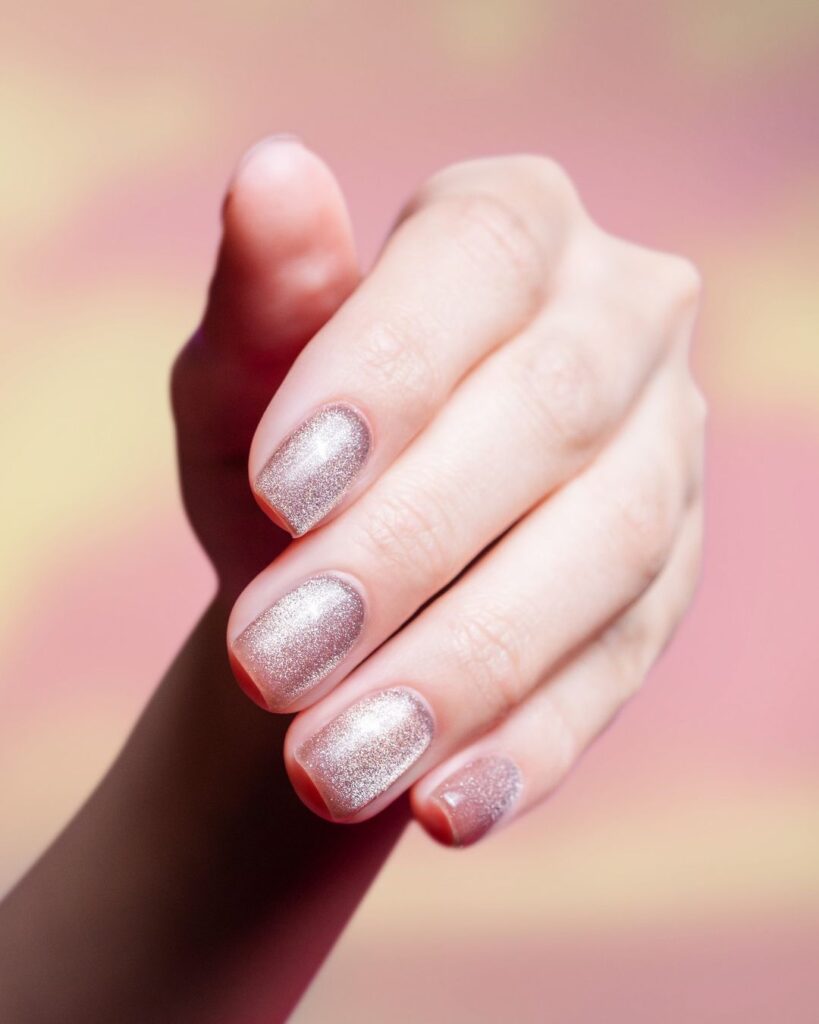
Ultra-Glossy Nails
Begin by prepping your nails with a base coat to ensure a smooth surface. Once it’s dry, apply a layer of jelly nail polish as the foundation for your glossy look. Allow this layer to set completely. Next, introduce a touch of magic with a magnetic velvet polish. Slowly hover the magnet over the wet polish, following the product’s directions, to manipulate the particles and create a captivating cat-eye effect. The key here is patience; allow the design to take shape under the magnet’s influence. Finally, lock in the luster with a high-gloss top coat. This not only seals your design but also adds a multi-dimensional shine that enhances the texture and ensures your nails catch the light with every gesture.
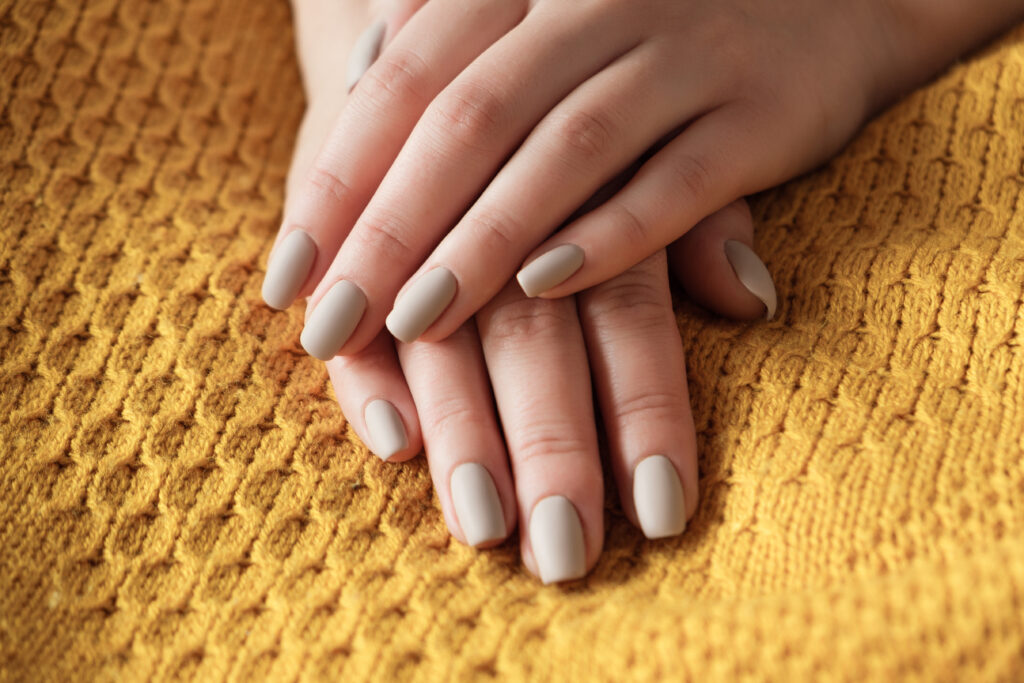
Chocolate Milk Nails
For a look that’s both chic and understated, start with a neutral base color. Choose from a palette of sandy beiges, soft pinks or rich browns to mimic the comforting hues of chocolate milk. Apply the first coat thinly and evenly, allowing it to dry before adding a second coat for full coverage. The aim is to achieve a creamy, matte finish, so steer clear of any polishes with shimmer or glitter. The beauty of this style lies in its simplicity; it’s the warm, soothing tones that take center stage. To maintain the integrity of the color, finish with a matte top coat, which will also extend the wear of your manicure. The result is a set of nails that exude elegance and a timeless appeal, perfect for any occasion.
Bright Lines and Little Hearts
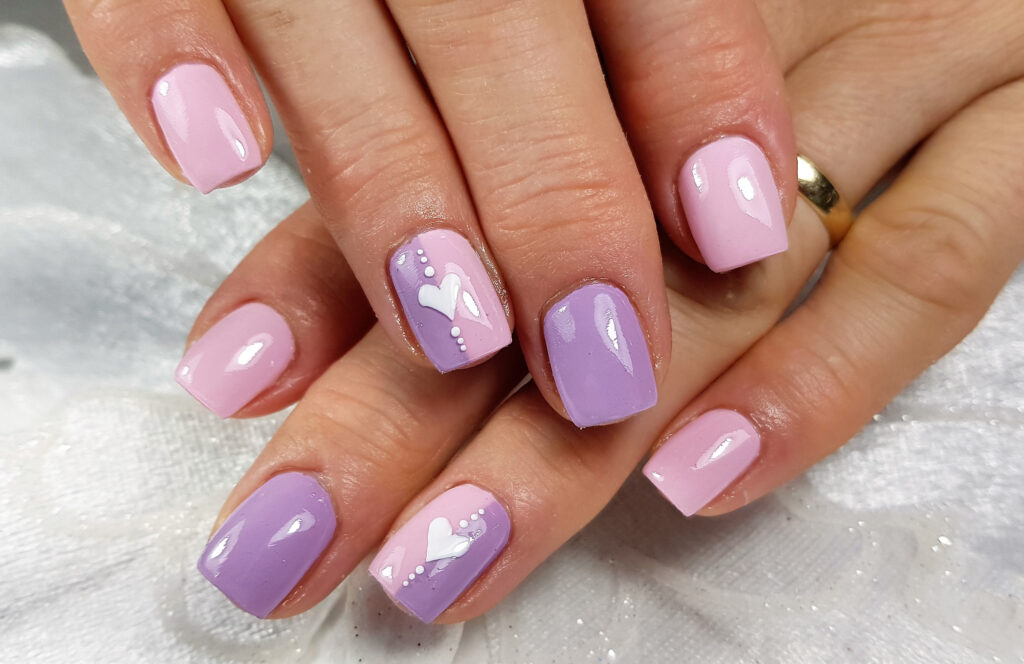
To infuse your nails with a vibrant burst of life, start by selecting a striking color palette. With a steady hand, use a striping brush or stationary tape to create bold, bright lines across each nail, ensuring each stroke is crisp and clean. Next, to add a touch of whimsy, take a dotting tool and gently place two dots in close proximity. Then, with a delicate motion, pull them to a point to form adorable little hearts. The beauty of this design lies in its versatility; you can opt for a random scattering of hearts or arrange them in a neat pattern. This technique allows for a playful yet personalized touch, making each nail a reflection of your creative spirit.
Half and Half
For a dramatic, eye-catching effect, choose two contrasting colors that reflect your personal style. Paint one half of each nail with the first hue, then carefully apply the second color to the remaining half. Precision is key, so take your time to ensure a clean line where the colors meet. If you’re feeling adventurous, experiment with different angles and divisions to create a look that’s entirely your own. For a seamless blend, slightly overlap the colors at the junction, creating a subtle gradient that adds depth and complexity to your two-tone design. This approach not only showcases your artistic flair but also offers a modern twist on traditional nail art.
Dip Dye
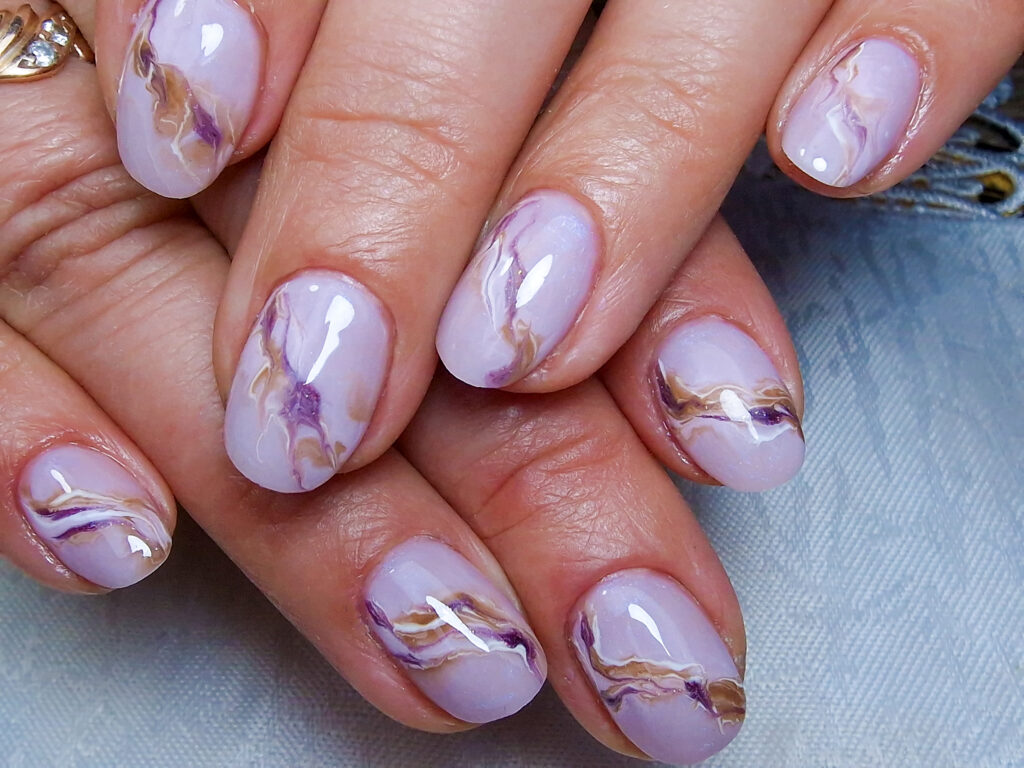
To create a Dip Dye effect that rivals professional nail art, begin by selecting a cup that provides ample space for your nails. Fill it with room-temperature water to ensure the polish spreads evenly. Choose two or more polishes that complement each other and add a few drops of each into the water. Gently swirl the surface with a toothpick to blend the colors slightly, creating a beautiful marbled effect. Before dipping, apply a clear base coat to your nails to protect them and enhance the adhesion of the polish. Then, dip your nail at a slight angle into the water, holding it there for a few seconds to allow the polish to cling to the nail. Slowly lift your finger out and you’ll see a stunning gradient that looks as though it’s been professionally dyed.
To perfect the look, clean up any excess polish from your skin with a cotton swab dipped in nail polish remover. Seal your design with a clear top coat to add shine and longevity to your dip dye nails.
Dainty Flowers
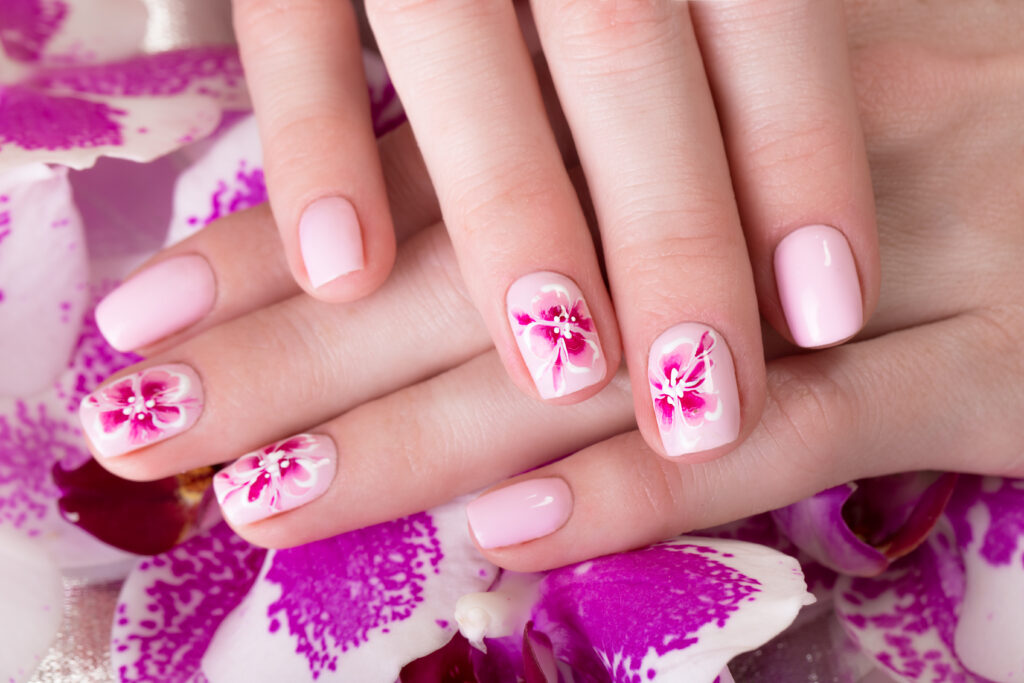
For Dainty Flowers, the process is just as simple but equally rewarding. After applying a base color of your choice, take a dotting tool and dip it into a polish that contrasts well with your base. Gently press the tool onto your nail to create a small dot. Repeat this around a central point to form the petals of a flower. Add a different color dot in the center to give the flower depth and dimension. The key to mastering this design is to keep it simple and delicate; the beauty lies in the subtlety of the flowers. Finish with a top coat to protect your floral design and give it a professional, glossy finish.
FAQ
To get started with Easy Nail DIYs, you’ll need a few essentials. Firstly, a variety of nail polishes in your favorite colors is key. Additionally, invest in a good base and top coat to protect your nails and prolong the life of your art. Tools like dotting instruments and striping brushes will also enhance your ability to create intricate designs.
For longevity, preparation is crucial. Begin by cleaning your nails thoroughly and applying a base coat. Once your design is complete, seal it with a high-quality top coat. Moreover, reapplying a top coat every few days can significantly extend the durability of your nail art.
If you’re new to Easy Nail DIYs, start with simple designs such as Floating French Tips, Short, Square Nails, or Dainty Flowers. These styles require minimal tools and are straightforward to achieve. As you gain confidence, you can gradually try more intricate designs like Negative-Space Neon or Dip Dye effects.
You can use a matte top coat over any nail polish color to give it a matte look. Alternatively, you can create a matte effect by holding your wet nails over steam for a few seconds, although this method can be less consistent than using a matte top coat.
Removing glitter nail polish can be tricky, but there’s an easy method. Soak a cotton ball in acetone, place it on your nail, and wrap it with aluminum foil. Let it sit for about 10 minutes, then gently slide off the foil and cotton ball. The glitter polish should come off easily without much scrubbing.

